…it begins to thicken. Use a spoon or fork to scoop the wax onto the outside of the ball candles until you are satisfied with the appearance. Let the candle cool completely, trim the wick to about ¼”, and enjoy!…
Search results for: VIPREG betwinner app promo code Bahrain
Wax Art – Rose
…candles. For instance, the hand-crafted roses could be used to decorate a pillar or the base of a taper and give it a truly unique appearance. Wax Art – Rose Contributed by: Mike & Brenda Blanton, Fancy Farm, Kentucky. …
Jelly Jar Flag Lanterns
…2: Carefully wrap a couple pieces of tape around two more of the jars to make approximately even stripes. Step 3: Dip your paint brush in the blue paint and gently paint all over the glass, taking care not to…
Fish-in-a-Bag Soaps
…melt in the microwave in 30-second increments until completely melted. You will need approximately 1/2 lb of soap for this project. 2. Add fragrance oil and liquid dye. We don’t recommend using more than 1 drop of colorant, or…
How to Make Palm Wax Pillar Candles
…our handy calculators if you need help determining the appropriate amount of wax. Melt the wax using a double boiler method. Step 2. The next step will be to prepare your mold. Select the proper wick for the diameter you…
4th of July Chunk Soaps
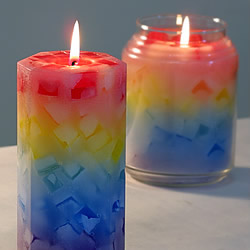
…renders darker colors. For the over-pour, we used Clear M&P base with no color added, and White M&P base with no color added. The white over-pour provided higher contrast for the chunks, but the clear ones were just as appealing….
Glitter LOVE Pillar Candles
…If you are not familiar with making pillar candles, check out our step-by-step tutorial. We chose to make square pillars since the flat surface is easier to work with when applying the letters. When the wax has reached the proper…
Heart Embed Candles
…and fragrance as desired. 3. Pour the wax onto the baking sheet until it is approximately half an inch thick. 4. Allow the wax to cool until it is firm but still pliable, like cookie dough. 5. Gently press…
Flowering Loofa Soaps
…mix well. 3. Pour into muffin cups about ½ full. 4. Place the loofa into the cup and compress with fingers to absorb the m&p base. 5. Pour remaining m&p base over the loofa’s and let set for approx 2…
Paw Prints Soaps
…color. Step 2: Squeeze some of the black soap into your liquid dye dropper and squeeze it back out into each paw print sections of the cavities. The dropper makes it easier to get the soap in the appropriate area…


Recent Comments