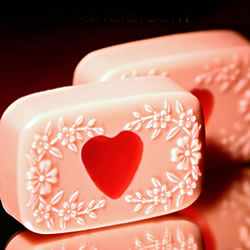
…Colorant Apple Green Pop! Mica Poppy Seeds Microwave Safe Measuring Cup Thermometer Instructions: 1. Cut your Clear Glycerine Soap Base into chunks and melt in the microwave in 30-second increments until fully melted. Add Allura Red Liquid Colorant (using…
Search results for: VIPREG betwinner app promo code Bahrain
Water Baths
…the right water level. I will go through them both. In the first approach, we place an empty, sealed, and weighted mold into the bucket and proceed to fill the bucket with water to a level about a half inch…
Hurricane Shells
…of the mold. If you are using a hurricane insert, place it inside the mold. Then surround the insert with the embedments of your choosing, taking care to arrange them how you would like them to appear in the finished…
How to Make Votives
Votives are arguably one of the easiest kinds of molded candles to make. They add a great deal of charm to just about any setting. The typical votive will burn for approximately 15 hours and will consume just about all…
Santa Claus Candles
…Buckle -Black Beads -Hot Glue Gun –Pouring Pitcher –Scale (recommended) –Wick Holder Bar or Wick Centering Tool (optional) Step 1: Melt your wax using the double boiler method. While it is melting, wick your container using the appropriate size wick…
Crackle Candles
…water. Repeat this process several times, then set the candle on a paper towel to dry off. You may not see the cracks appear right away, but they should appear over time. If you do not see any cracks by…
Stars and Stripes Candles
…be used for an overdip. For our 3” x 3.5” candle in the 2 lb. pouring pitcher, we melted approximately 1 lb. of wax for the overdip. Add Navy Blue dye, and fragrance if desired. Step 4: With your blue…
Wick Centering Tools
…Centering Tool Company have put together a handy dandy tool, appropriately called the Wick Centering Tool. The usage is simple and straight-forward. Once your wick is adhered to the bottom of the jar, simply slide the top of the wick…
How to Use Pillar Wick Pins
…3” Diameter Round Molds: You will need: -3” Diameter Round Mold (Seamless works best but the Sheet Metal Molds will also work) -3” Wick Pin (Height should be appropriate for the height of your mold) –6” Pre-tabbed Wick OR Raw…
Rock Salt Candle Holders
…(such as a paper plate) and allow to dry. Depending on how much colorant was used, this may take several hours to a full day. Step 3: When the salt has dried, use a brush to apply a light coating…


Recent Comments