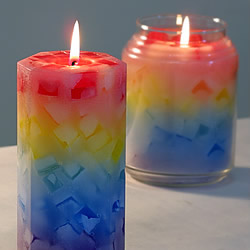
…the wax for the white layers, adding fragrance and Stearic Acid if desired. (Stearic Acid will increase the whiteness and opacity of the wax, and help prevent color bleeding). When the red layer has cooled enough to be somewhat firm…
Search results for: VIPREG betwinner promo codes Panama hat
How to Make Hand-dipped Taper Candles
…a bit longer than paraffin or beeswax. So if you have too much free time on your hands, give soy tapers a try and let us know how it goes. Otherwise, we’re going to assume that you’re using either paraffin…
Tilted Layers Soaps
…Once the first layer is solid but still somewhat warm to the touch, use a fork to make score lines on the soap to help adhere the two layers. Step 5: Re-melt your second color and stir to ensure there…
Hurricane Shells
…You will need to melt enough wax to fill your mold (handy calculators). You may add a touch of dye if desired to tint the wax. Too much dye will diminish the amount of light that is permitted to pass…
Mottled Pillar Candles
…wax according to your desired look. Straight Paraffin – IGI 1343 will mottle a bit in places, creating a somewhat randomized mottled appearance. Mottling Wax – IGI 1274 is designed to mottle more than Straight Paraffin, for more consistent, all-over…
Popsicle Soaps
…the molds with non-flavored cooking spray before pouring the soap to help release. Step 4: Allow the soap to begin cooling, but keep an eye on the temperature and consistency. Once the soap has formed a somewhat thick skin on…
Chunk Candles
…would glow nicely from within and allow the colors to show through the wax to some degree. Color Suggestion: Work with colors that are complimentary, generally those that occur together in nature. To find out what those are, look at…
Watermelon Soaps
…accelerate the cooling process by either placing a fan in front of the mold or placing the mold in a cookie sheet full of cold water before you pour the soap. Once the soap is green pour somewhat firm, you…


Recent Comments