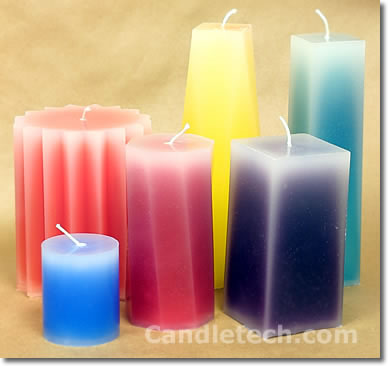
Instructions for creating pillar candles with a faded look.
You will need :
- Straight Paraffin Wax – IGI 1343
- A mold with sharp edges (square, hexagon, star, etc.)
- Liquid candle dye
- Desired fragrance oil
- Wick and wick screw
- Mold sealer
Tip: Try referencing the Hurricane Shell instructions and the Pillar Candle instructions for some background information and help.
1. Wick your mold as usual.
-Do NOT add your dye or fragrance to your wax the first time you melt it.
2. Pour the un-dyed, unscented wax (straight paraffin preferred) into your mold at your normal pouring temperatures.
3. Let it cool until the sidewalls are about 1/4 to 3/8 inches thick. A water bath helps.
4. Pour the inner wax back into your melting pot. Add some dye and fragrance. Get your temperature about 10 degrees F above the melting point of the wax.
5. Pour it back into the shell. Return it to the water bath.
-You can play with wall thickness and pouring temperatures to see what you like.
Tip: Molds with sharp edges work best. Use squares, stars, rectangles, octagons, whatever. Round molds don’t look quite as nice for this.
Variations include using different colors for the shell and for the core.


Hi,
I have a pic of 3 candles I did with chunks. How can I send it to you?
Thanks and regards,
Alan (Best name ever !!!)
alan@peakfragrances.com
Maybe we should figure out a way to enable photo uploads? I’ll look into it. I think it might be a lot of fun. For instance, I am not sure I ever got to see anyone else’s “Faded Edges” candles. I made those about 15 years ago.