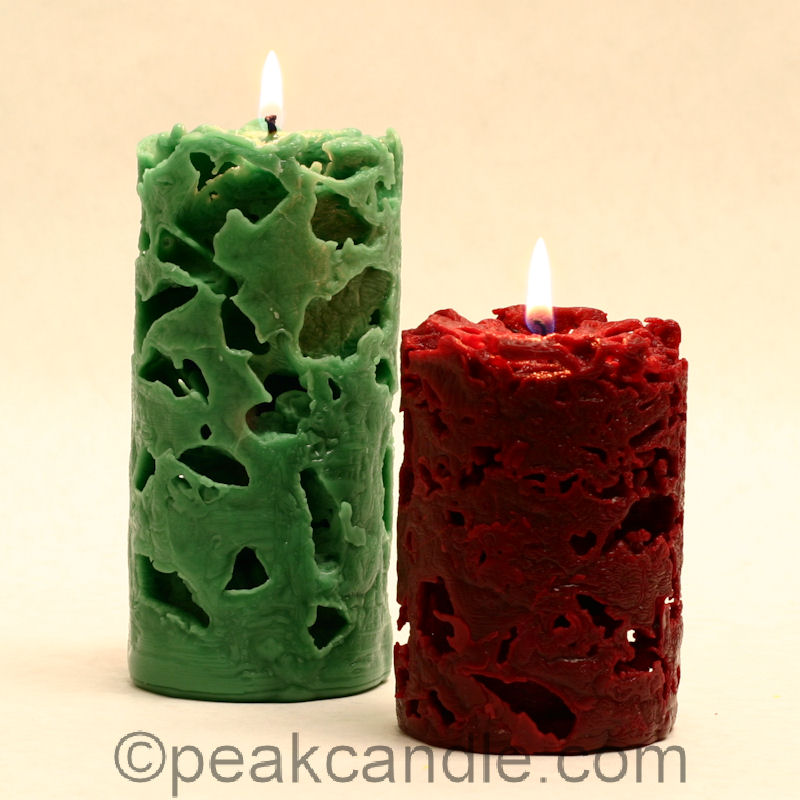
Fire and ice meet to create these beautiful candles.
You Will Need:
- Pillar Wax (IGI 4625 works great!)
- Metal Candle Mold
- Wick Screw
- Mold Sealer
- Wick Holder Bar
- Pouring Pitcher
- Double Boiler or Wax Melter
- Crushed Ice
- Bucket or Sink
Instructions:
 1. Wick your mold and prepare your wax as usual. Refer to our Pillar Candle Instructions for help.
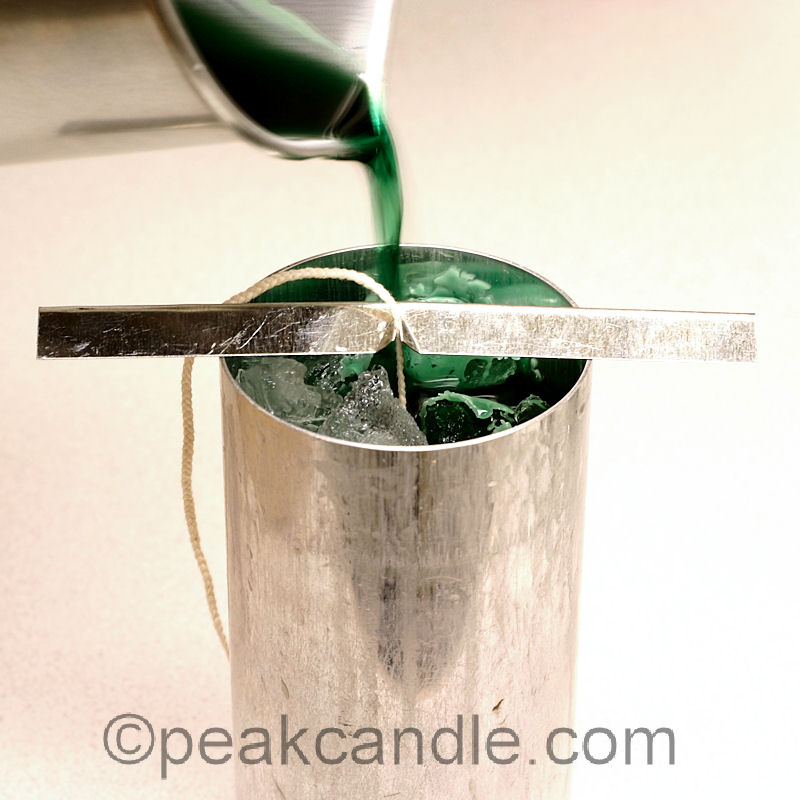
2. Crush up pieces of ice until they are about 3/4 inch in size. Spoon the ice into the mold until it is almost full. Leave some room beneath the rim of the mold so that the wax has room to completely cover the ice.
3. Quickly pour your wax over the ice and into the mold. Try to pour all over instead of in one spot so that you don’t melt a hole through the ice.

4. Allow the wax to cool and ice to melt completely. Then turn the mold upside down over a sink or bucket to dump out the melted ice water.
5. Remove the mold sealer and wick screw and gently remove the candle from the mold. Handle the finished candle carefully as it is very fragile.
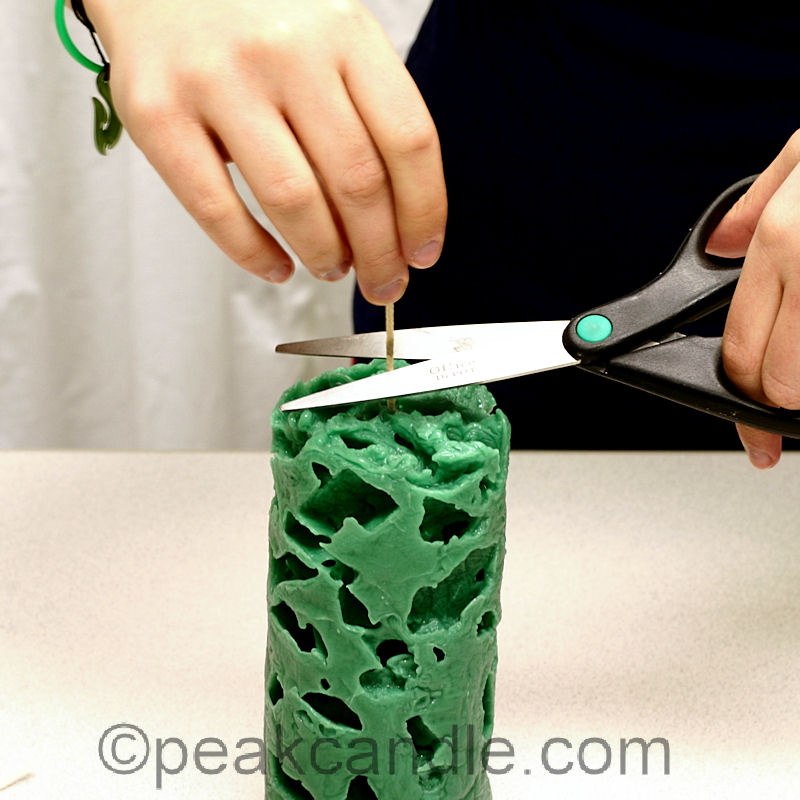
6. Trim the wick to about 1/4″ and allow the candle to dry for at least a week before lighting. If you light the candle while the wick is still wet or damp, it can cause sputtering while it burns.
7. Enjoy watching the beautiful designs on the candle as it burns!


Leave a Reply