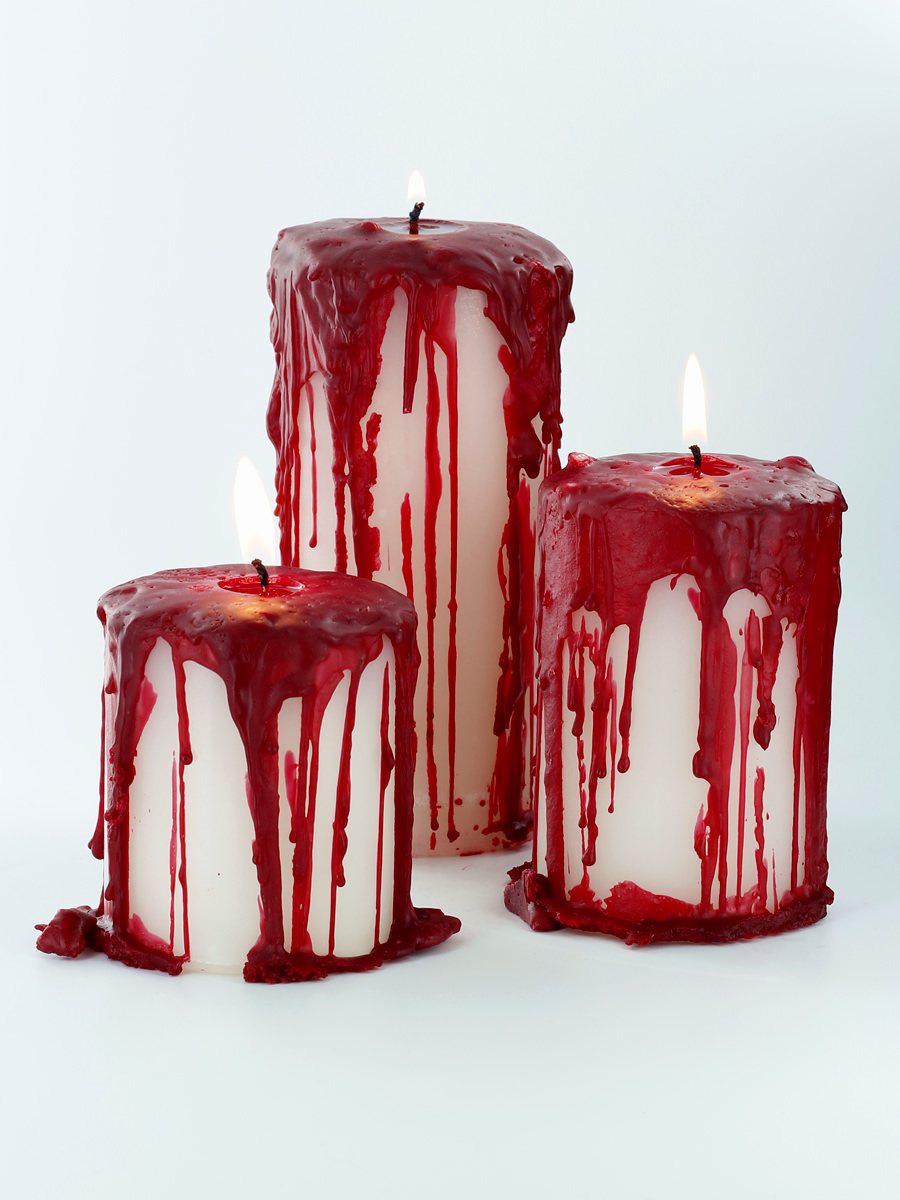
These bloody pillar candles will give the perfect spooky effect for Halloween décor!
You Will Need:
–Pillar Wax (IGI 4625 works best for this project, but Ecosoya Pillar Blend will also work)
–Candle Molds (any size or shape will work)
–Wick
–Wick Screw
–Mold Sealer
–Pouring Pitcher
–Red/Pink Concentrated Liquid Dye
–Fragrance Oil (optional)
–Stearic Acid (optional)
Step 1:
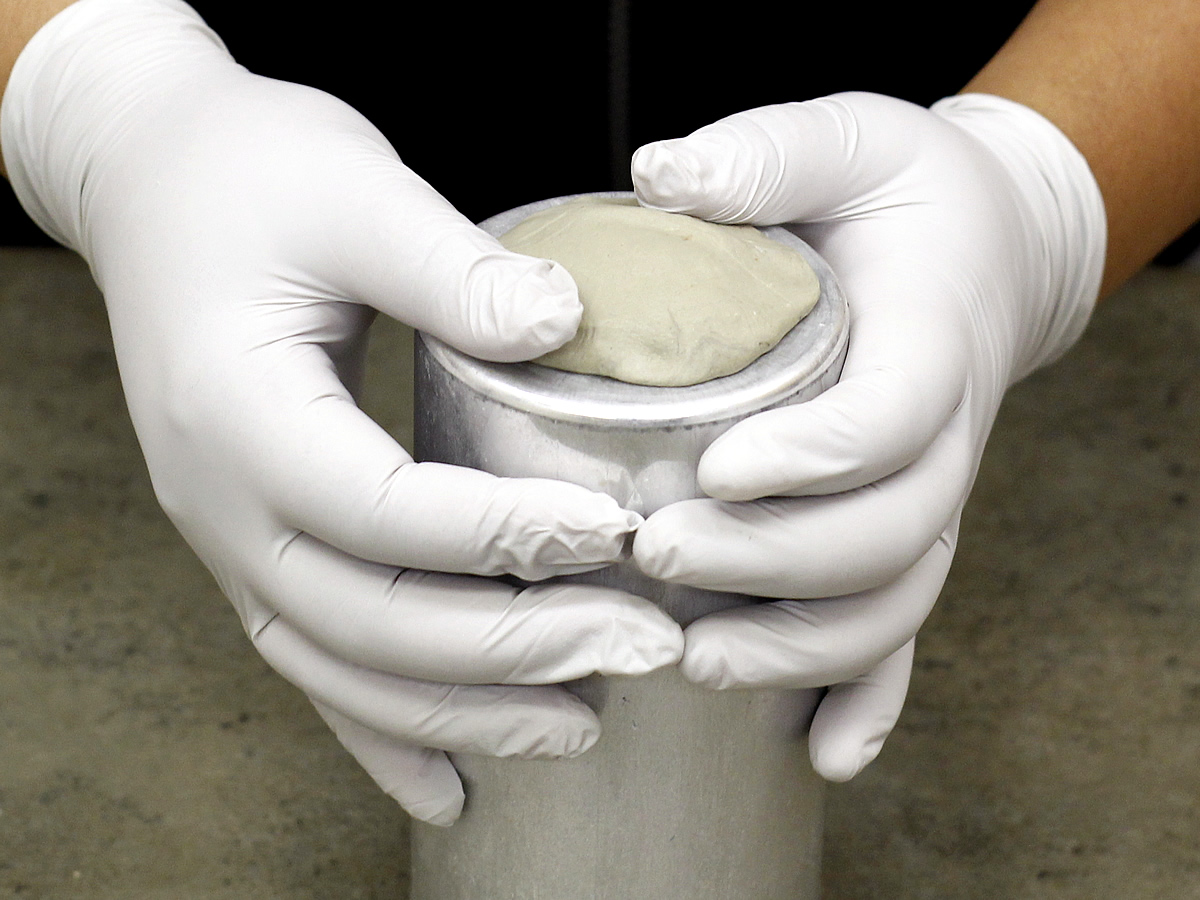
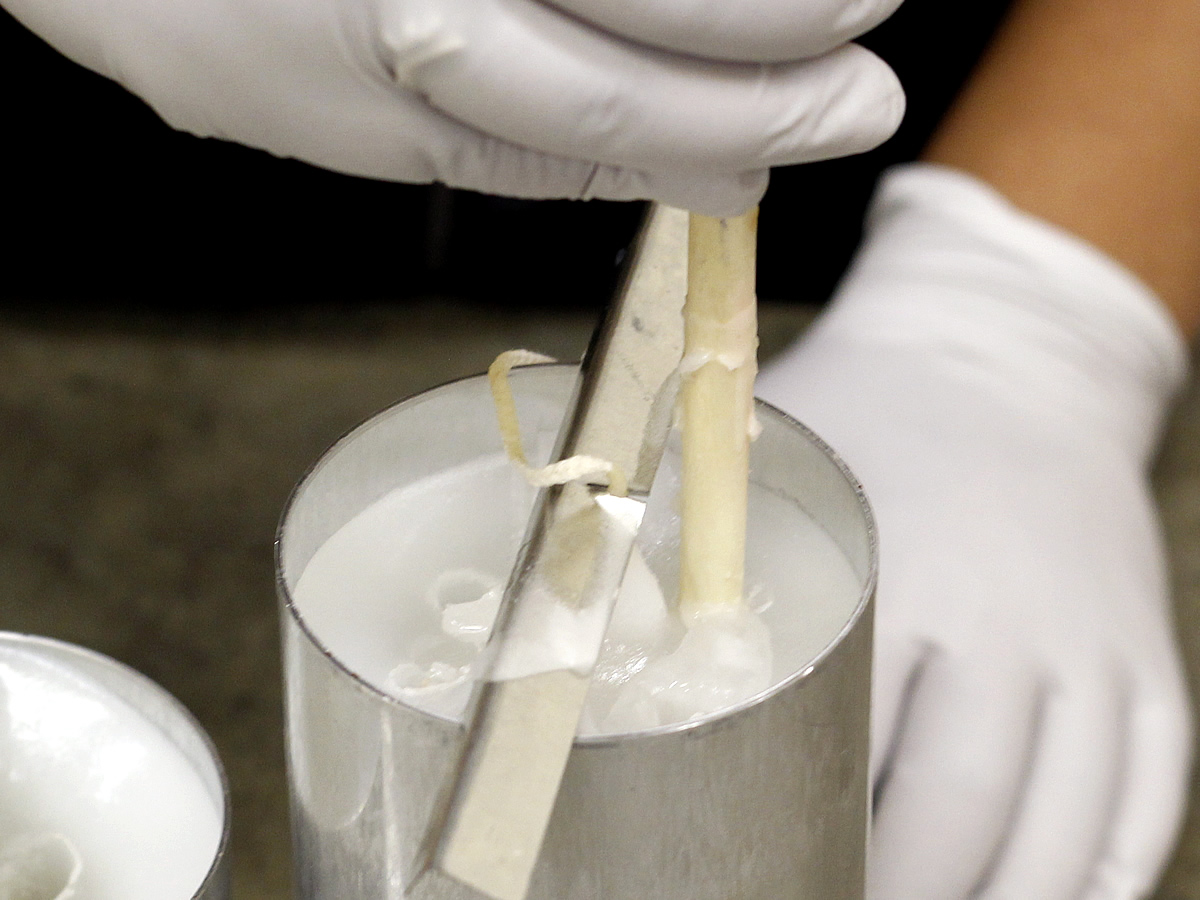
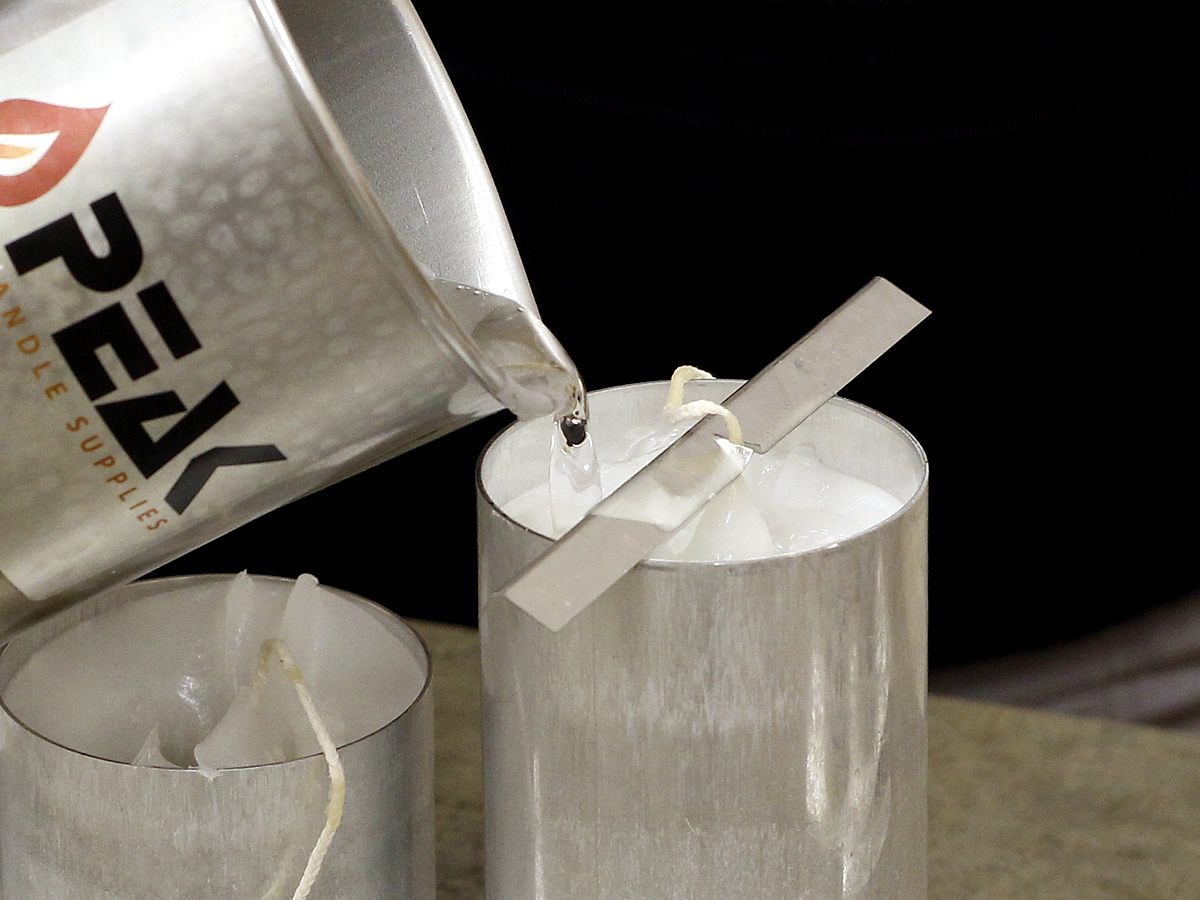
Using the double boiler method, melt enough wax to fill your mold(s), including the second pour. If you’re not sure how much wax your mold will take, try our handy calculator. While the wax is melting, prepare your mold(s). Insert the wick through the wick hole, secure with a wick screw, and cover with mold sealer. Secure the top of the wick with a wick holder bar or skewer. You may also use wick pins if you prefer.
Step 2:
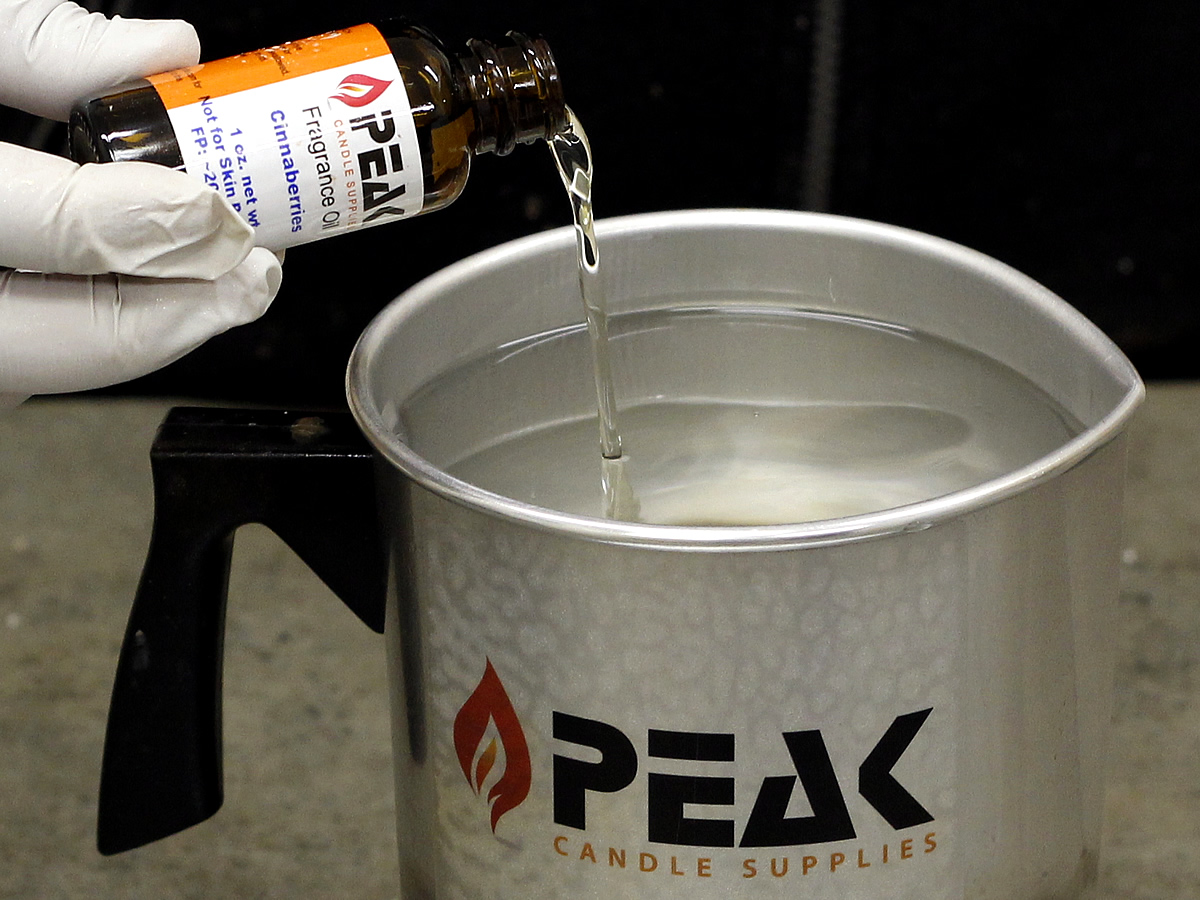
When the wax is fully melted, add your fragrance (if desired) and mix thoroughly. DO NOT add any dye to this wax.
Tip:
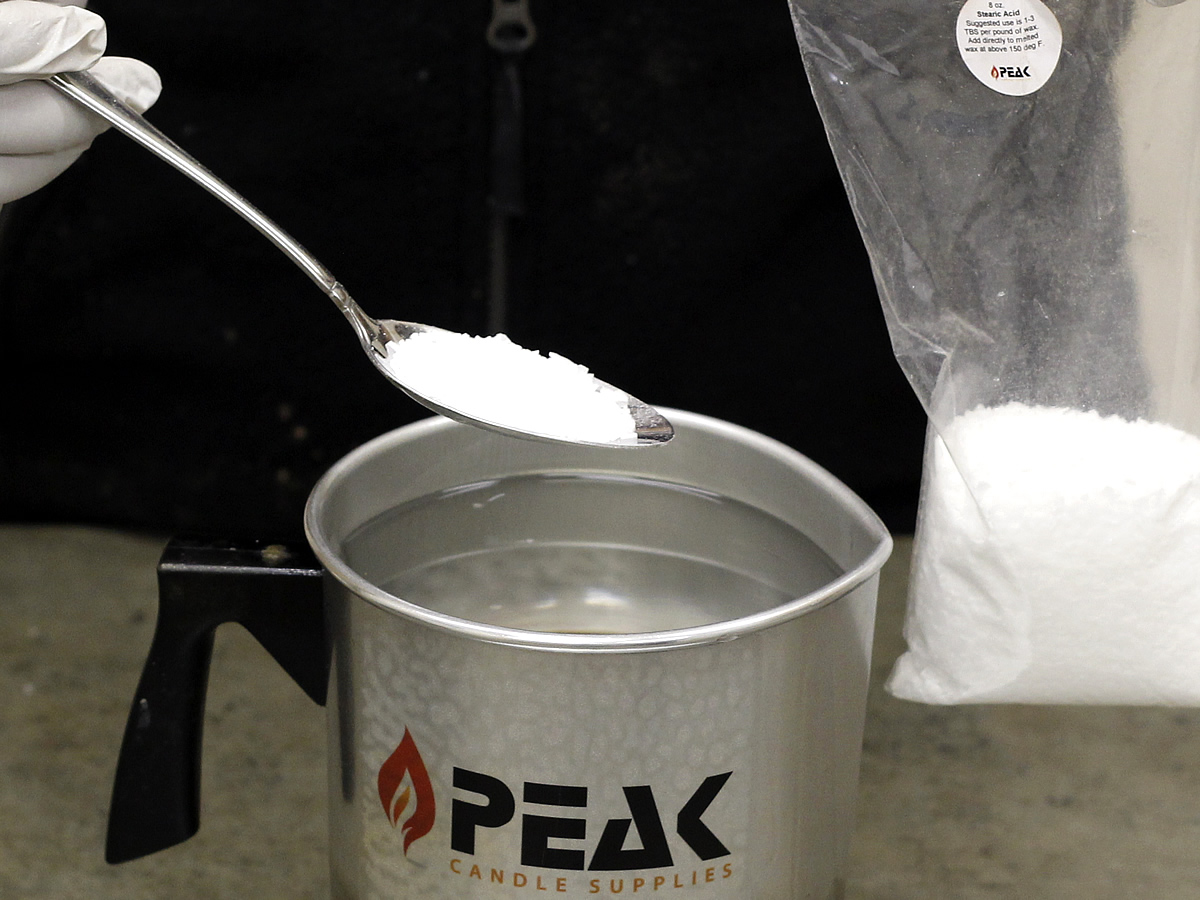
For a more vibrant, ghostly white, you can add Stearic Acid to increase the opacity of the wax.
Step 3:
Pour the wax into the mold(s) and allow to cool. As the wax cools, be sure to poke relief holes to provide a vent for the contracting wax. This will help prevent bubbles from forming or the wick from being pulled off-center.
Step 4:
When the candle has cooled to room temperature, re-heat the leftover wax and fill the sink hole. Allow to cool completely.
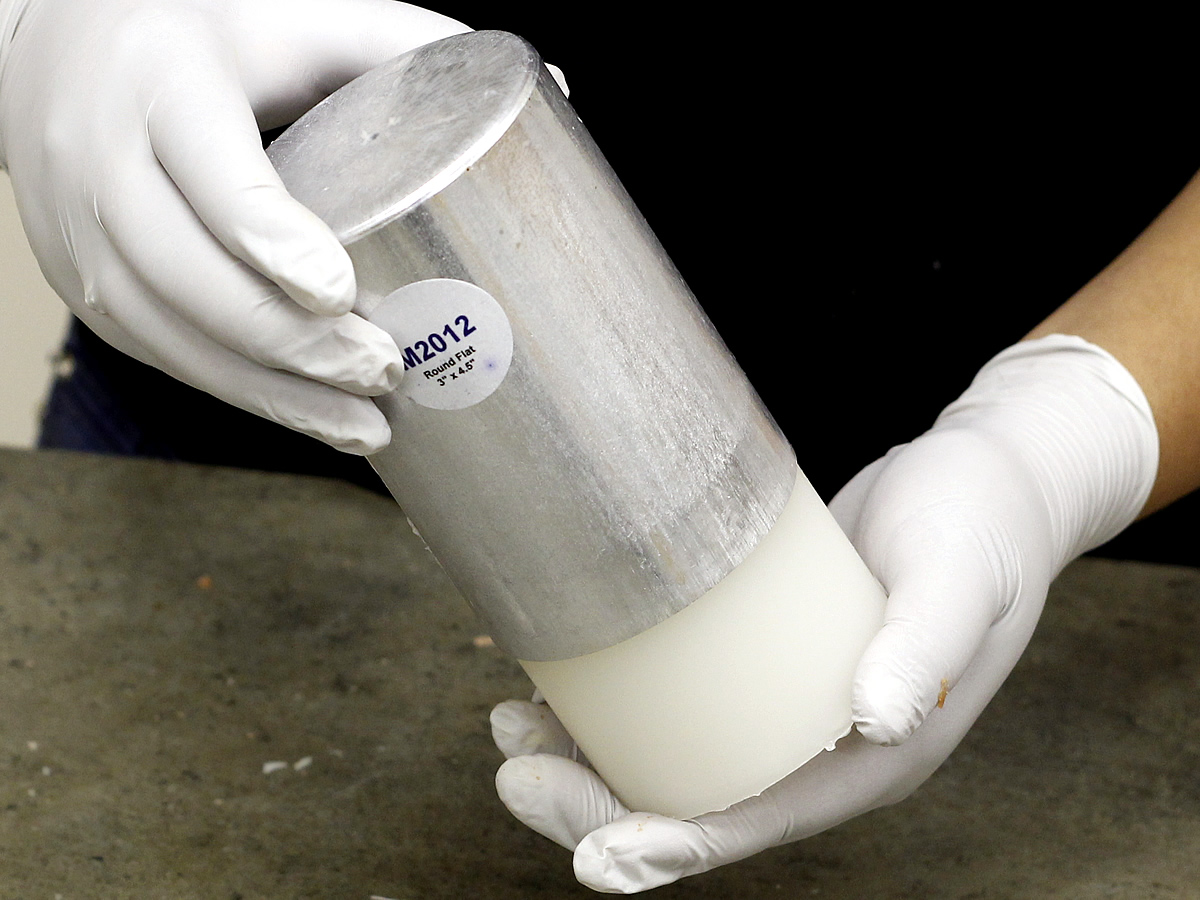
Step 5:
Remove the finished candle(s) from the mold(s) and trim the wick on the bottom. Leave the top of the wick long for now, until you have added the bloody wax on top.
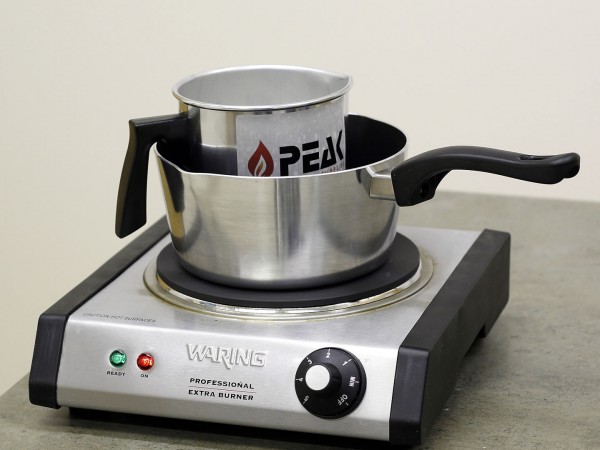
Step 6:
Melt a few more ounces of wax in a double boiler. The amount of wax you need will depend on the number and size of the candles you have made, and how bloody you want to make them, so just do a rough estimate. You can always save the leftover wax for another project.

Step 7:
When the wax is fully melted, add your red colorant. Liquid dyes work best because they are more concentrated to give you a more vibrant color. You will need to use quite a bit to get a nice deep red color. Try adding a drop or two of brown for a more realistic effect. You can test the color by dripping some onto a white paper plate or paper towels.
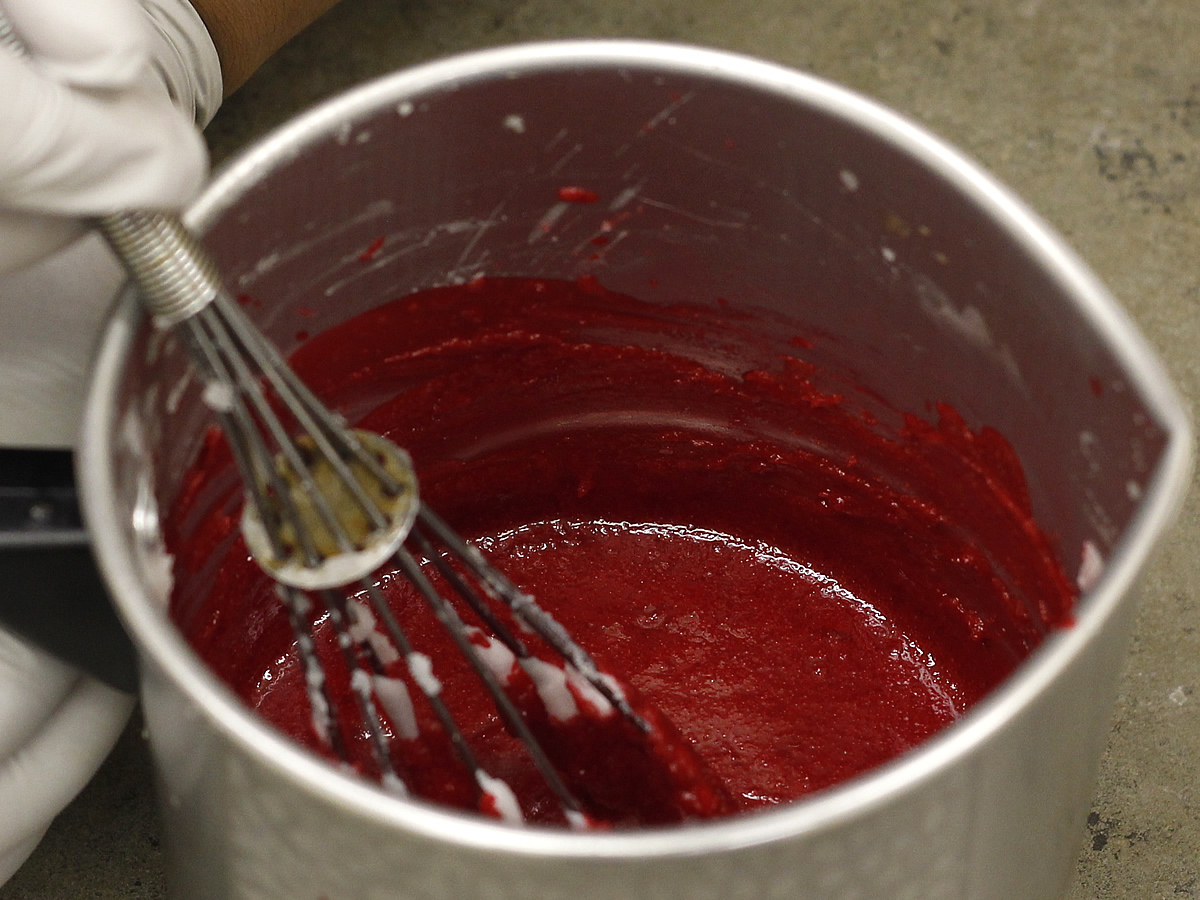
Step 8:
Once you have achieved your desired color, remove the wax from the heat and stir with a spoon or whisk until it reaches a thick, syrupy consistency.
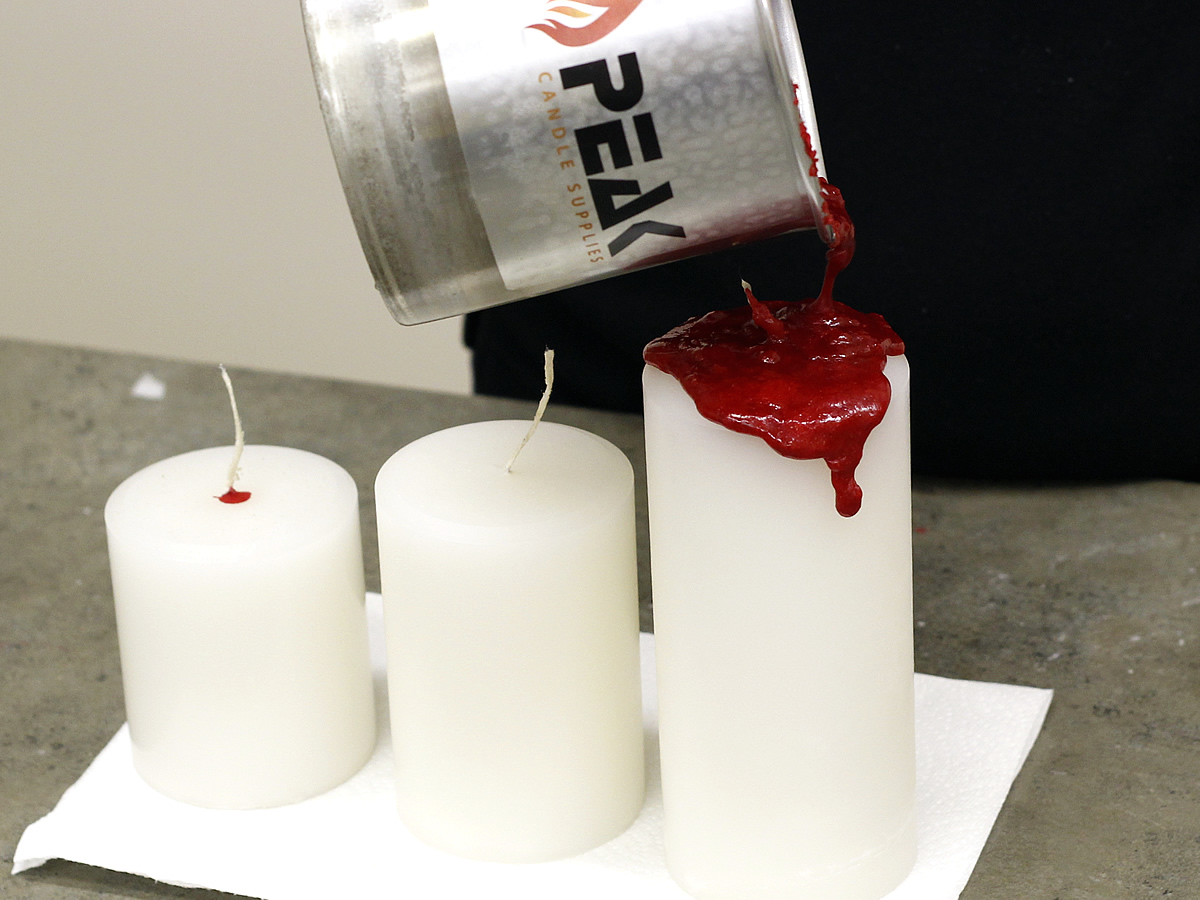
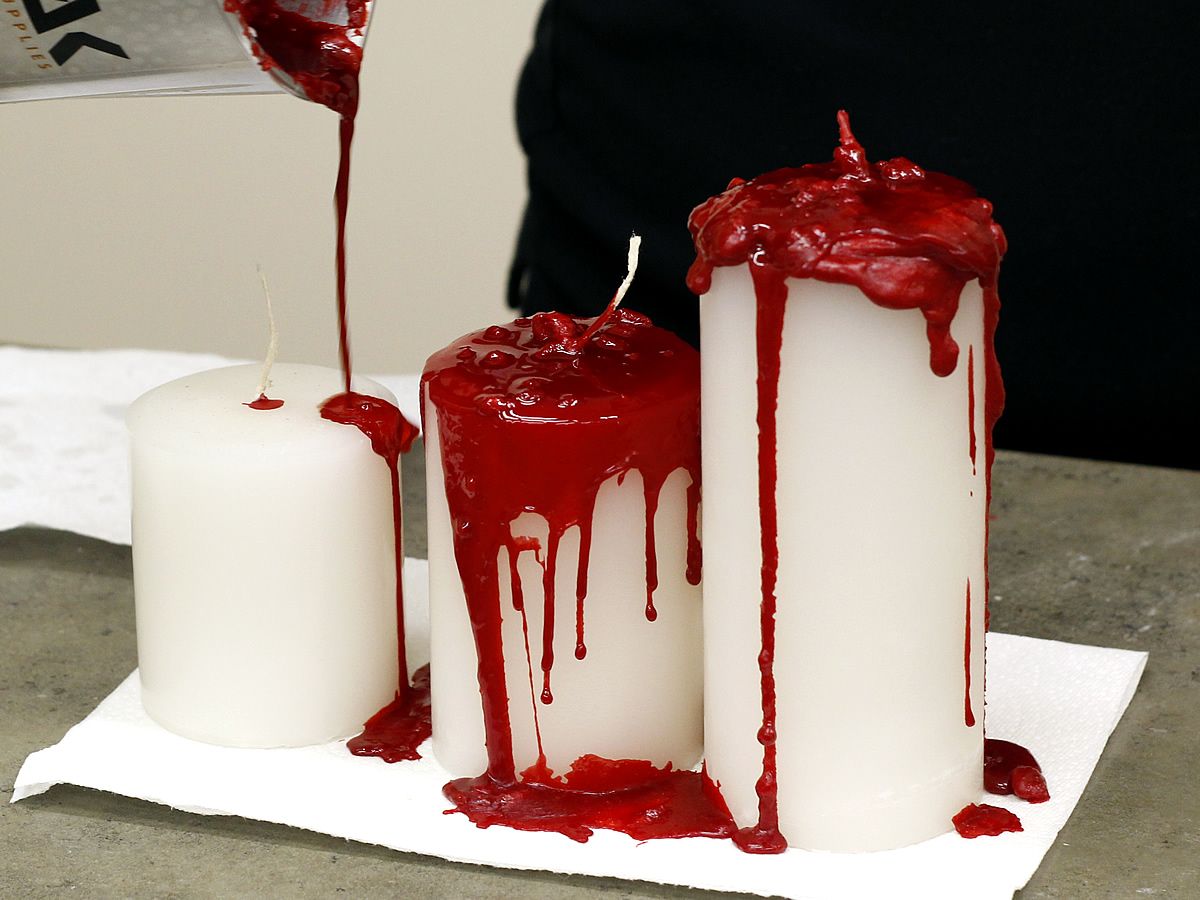
Step 9:
Place your finished white candles onto some paper towels or newspaper, and drip the red wax all over them. You can use a spoon to help distribute more wax down the sides. Allow the wax to cool completely, and trim the wick on the top to about ¼”. Now enjoy your creepy bloody pillar candles!


How do you keep the bloody wax sticking to the candle? My wax drips down the candle but as it dries, some of it separates from the candle itself, making it stand away from the candle and breaks off.