Step-by-step instructions for Cold Process Soap Making
Cold Process Soap Tutorial (with swirls):
Contributed by: Waters Gulch
There are three main types of soap making. Melt and Pour soaping involves melting a premade base and being creative with color and fragrance. In Hot Process soaping, you cook the ingredients all the way through the process, adding heat to speed the reaction. In Cold Process soaping, you do not add extra heat to the reaction; you let the heat generated by the chemistry drive the process.
Each process has its benefits. M&P is extremely easy, and can be very creative and colorful. Hot Process gives you soap that is ready faster than Cold Process, and gives you the option of using fragrances that do not work well with lye. Cold process soaps take longer to cure, but have a smoother texture and are easier to swirl.
This tutorial decribes the Cold Process method of making soap using Peak Candle Supplies’ Rose Bouquet Fragrance Oil.
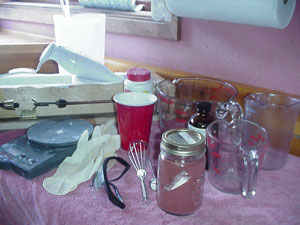
Gather all your ingredients, and print out the recipe you have selected. You’ll need:
Containers:
- A lined mold. You can use cardboard boxes, untensil drawers, pringle cans, just about anything that will hold heat. Or you can buy/make your own mold. I’m using a log mold. You can line with freezer paper or heavy plastic garbage bags.
- A soaping pot large enough to hold all your oils. Two pounds of oils will fit in a 8 cup measuring bowl. A larger recipe will need to be made in a larger pot.
- A second container to measure oils on your scale. Your soaping pot will probably weigh too much for your scale.
- Measuring cups to hold any colors, fragrance, and additives.
- A cup to measure lye, and a container to hold the mixed lye. Using something large enough so you don’t splash. A two pound soap recipe will need a lye container that will easily hold 12 ounces of water with room to spare. A Rubbermaid pitcher is ideal.
For your containers, use glass, stainless steel, ceramic, or heavy plastic. Do NOT use teflon or aluminum pans. The lye will react with them, turn black, and you’ll have a wasted batch. Also make sure it’s good stainless steel- cheap stainless you get at the dollar store won’t work either.
Important safety items:
- A scale is critical. Mis-measuring batches can give you a dangerous lye heavy batch. One that measures down to .1 oz or 1 gram is fine.
- Most important, your gloves and goggles. You can use regular yellow dish-washing gloves. I use latex exam gloves. Make sure your goggles cover your eyes completely-don’t just use your glasses if you wear any. Lye splashes can blind you, and accidents happen.
Miscellaneous items:
- Stick blender
- Digital thermometer
- Stainless measuring spoons
- Wisk
- Large spoon
- High heat spatulas
- Towels
A summary of the following steps:
- Prepare your mold
- Mix lye water solution
- Measure hard oils, melt measure soft oils
- Mix hard and soft oils
- Mix in lye and start blending
- Mix coloring
- Add fragrance, bring to trace, add color
- Pour into mold
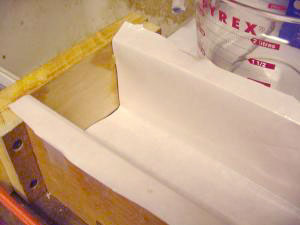
Line your mold. You can use just about anything for a mold- a shoe box, a Pringles can, a plastic cutlery tray. Just make sure you line it using freezer paper, shiny side toward the soap. You can also line it with a cut up heavy duty plastic garbage bag. Wax paper will stick to your soap and tear apart.
I’ve used transparency paper to line the end of my molds, and freezer paper for the rest.
OK, time to get on your goggles and gloves.
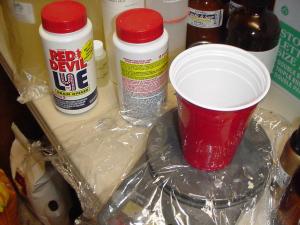
Measure your water and lye into separate containers. I use a large Rubbermaid container for the water. Use cool distilled or rain water. Tap water may work, but it might have metals or additives that can change the outcome of your batch. I am measuring the lye crystals into this red cup.
Lye can give you dangerous burns, and you need to protect your eyes. Use proper precautions, though, and you will be fine. Make sure children and animals are away from the area, we’re getting to the point where we don’t want to be interrupted for the next 30-45 minutes.
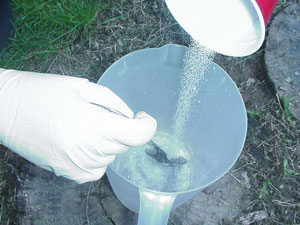
In a ventilated place (I go outside) pour the lye INTO the water while stirring. Be very very careful do not breath the fumes. Lye will will heat up to 200 deg. F. and be cloudy. Keep stirring to incorporate the lye.
Put your lye water in a safe place to cool where you can keep an eye on it. You don’t want to knock it over, or have someone drink it by mistake.
This concentrated lye water can burn naked skin.
The lye will be around 100-120 deg. F. and clear when it is ready to be used.
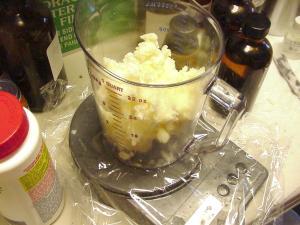
While your lye is cooling, measure your hard ( solid at room temperature) oils into your soaping pot, and start melting them. I will be melting these in the microwave, and it will take about 5 minutes. If you are using a stainless steel pot, you can also melt your oils on the range, watching the temperatures carefully.

While your hard oils are melting, you can measure your soft oils, and any remaining additives, color, or fragrances.
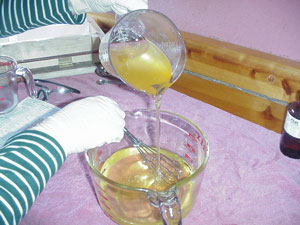
Once your hard oils are melted, add the soft oils, and stir to mix. Adding the cool oils to the melted hard oils will help to bring the temperatures down to the correct range. We’d like the oils to be 100 deg. F. or maybe a bit less, and the lye to be around 100F-120 deg. F.
While you’re waiting for the correct temperatures, review your recipe, and make sure you’ve got the rest of your ingredients measured and available.
Starting now, there’s no turning back, the reactions will begin. Are you ready?
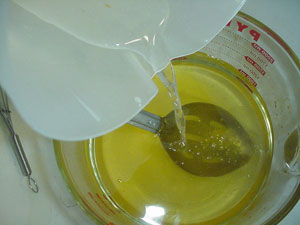
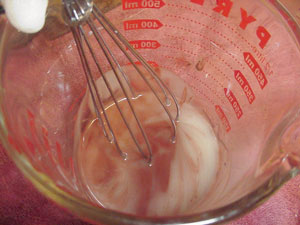
With the temperatures at the proper level (around 100 deg. F.), slowly mix the lye into the melted oils, stirring carefully to incorporate. Be gentle, and remember, you still have goggles and gloves on, and should through the rest of the process.
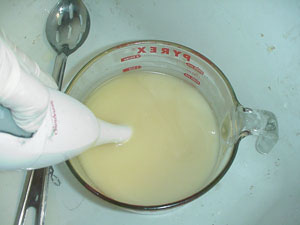
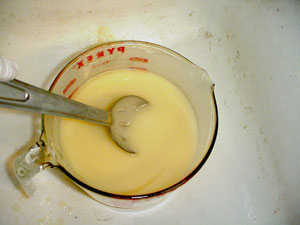
Start stick blending the mixture. I use my stick blender on low power for 30 seconds at a time, then stir with it off, then back on again. Keep the head under the surface to prevent bubbles, and move it around to make sure you’re hitting all areas.
You can do this the old fashioned way too, stir with a spoon and not a stick blender. However, this could take quite a while. If you do want to hand stir, you can stir for 5-10 minutes, stop for a while, then stir again. You don’t need to constantly hover over the pot.
After a few minutes, when it looks like its pretty well emulsified ( but still thin), pour some soap mixture off (about 1/4-1/2 c) into the bowl that contains your coloring. I’m using red and pink Australian clays for my color.
Set aside while you finish up the next steps.
This step is optional if you are going to leave your batch uncolored.
In your main pot, stir in your fragrance with a spoon, and keep stirring the mixture until it starts to thicken. This is “trace”, when it starts to feel like a light pudding.
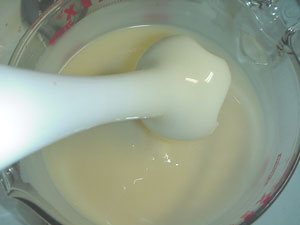
Be prepared to move quickly! Some fragrances quicken the trace, or cause the soap to “seize” (harden immediately into a glop of soap). Until you know how your fragrance acts, hand stir to slow down the tracing. If your fragrance is well behaved, you can hit it with the stick blender. For this recipe, from the time of adding the lye to the thin trace, it took about 5 minutes.
What does trace look like? The mixture will start to thicken, and stick to your stick blender or spoon. When a drip falls back into the pot, it will sit on the surface for a second before blending in. The key to successful swirls is finding the perfect consistency – not too thin, but not too thick. This picture shows a medium to thick trace.
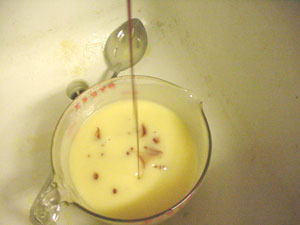
I’m going to “swirl in the pot”. I’ve poured my colored mix into the main pot. I held my cup high while I was pouring, to make sure some got to the bottom, then lowered the cup to pour the last of it.
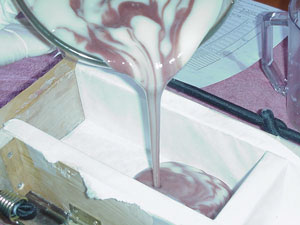
Of course this step is optional if you are not coloring your batch.
Pour your final mixture carefully into the lined mold. You’ll see the swirled soap come out in a pattern. Move the pouring pot back and fourth to even out the colors.
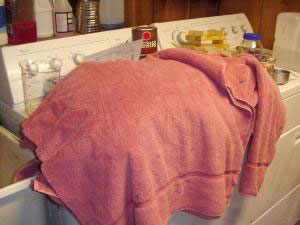
Putting the mold “to bed”. Wrap it in towels to keep it warm. “Gel” is a heating stage of saponification. It doesn’t have to gel to become soap, but it hastens the process, and makes colors look brighter. If you get a partial gel, the edges of your bars will be lighter in color than the center. Wrapping in towels, or placing in a warmed oven, will ensure “full gel”
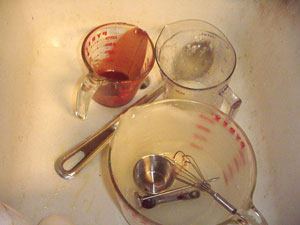
One craft where leaving the dirty dishes is the best thing you can do! Leave them until the next day. The oils will turn into soap, making for easier clean up. Make sure no one touches them, though, because this is still raw soap and can burn.
If you’ve got to clean it up right away, keep your goggles and gloves on. It’s going to be oily, so clean it up as best you can, use some dish washing detergent. You can completely clean by hand, or stick everything in the dishwasher. (It really is easier to wait for the next day, if you can leave dishes safely).
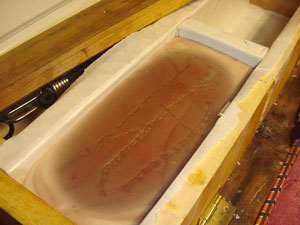
After an hour, “gel” is proceeding nicely. Gel is caused by the high temperatures of the chemical reactions. See how it’s getting darker in the middle? It’s almost looking translucent, but hasn’t hit the edges yet. You want that gel to be even, otherwise your bars will be two-toned and will have an uneven texture.
This actually looks like it’s getting too warm – the FO is beading up on the top. I put the wood cover back on, but only put the towels on the ends.
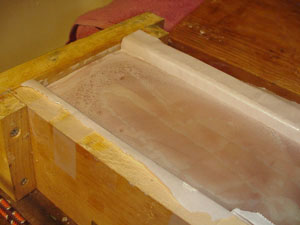
It’s been 4 hours, coloring is back to normal. Looks like it gelled all the way to the edges, no circular marks left. Mold is still warm to the touch. We won’t unmold it until tomorrow morning, when it’s completely cool. Again, if you peek, do it quickly and cover it back up.

Notice on the end there is some white speckling. This is “ash”. Sometimes you’ll see it, sometimes you won’t. In this case, the wooden cover had been knocked off the end, so there was cool air around the log as it was curing. It’s thought that ash is a reaction of lye with air to produce some kind of carbonate layer. You can trim or rub it off.
You should leave the soap in the mold for at least 24 hours. If you discounted water, you might be able to unmold sooner. Make sure that it is completely cool.
Next morning, the log has been unmolded. It’s cool to the touch. If a log you make still seems wet and very soft, you might want to leave it like this for an extra day to harden up a bit before you cut. You can see the ash on top of the log – it will be trimmed off.

Cutting the log. I use a pastry scraper, but you can also use a knife, fishing/guitar/piano wire, anything thin to cut. I cut my bars 1 inch thick. Some cut 1.25 or 1.5 inches for a chunkier look. These bars will end up a bit more than 4 oz in weight
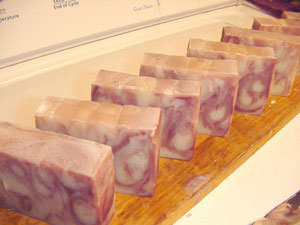
The cut log. Place the cut bars in on a shelf to cure for 2-4 weeks*, depending on your recipe (the deeper the water discount, the quicker the cure). Turn the bars every few days so they don’t warp and deform. As they cure, they will lose more of their water weight, and become milder, since saponification can continue for three days or more.
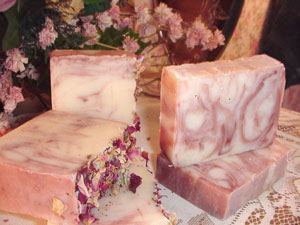
The finished bar. This also shows some bars from the previous batch, where I added rose petals to the top of the log right after I poured it into the mold.
* Cure time is dependent on your recipe, the amount of water discount you take, how heavy a trace you pour at – lots of different variables. The older the soap, the better it gets. “Standard” cure time is usually quoted as 4-6 weeks. If you use a high amount of olive, that should probably be 4-6 months.


Leave a Reply